I don't want to bore you with unnecessary details of the last minute mechanics of preparing for the contest. Suffice it to say that the week before the event was a very busy one. Luckily, both Tom and I had plenty of free time that week! Here are a few highlights...
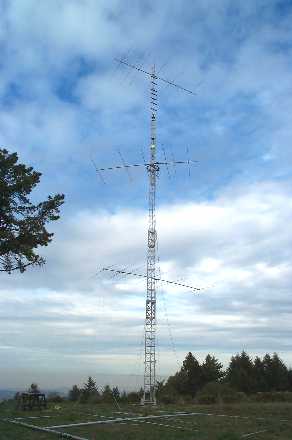
The first thing that we did was to lower the top antenna from the tower, and fix it in the same way that I had fixed the 'mixed taper' antenna. I moved the first reflector closer to the driven element, and adjusted the lengths of those two elements. Now all three antennas were under 1.3:1 at 28.4, and had nice broad SWR curves as they were designed to. Then began the process of getting all this aluminum, and its associated parts, up onto the tower. We raised the top antenna back up, installed the Ring Rotor, and mounted the middle antenna (the 'mixed taper' one) on the Ring. Then we mounted the lower antenna, and installed the StackMatch, coaxes, rotor cables, etc.
The lower antenna mount deserves a quick note - I have never seen this done before (although I am sure that it has been, and I just don't know about it). As I mentioned in Part 4, the top two antennas were independently rotatable. The top one was mounted on the mast at 85', and was turned with a prop pitch. The middle one was mounted on a Ring Rotor on the top of the third section of the crank-up, which put it at about 55'. The bottom antenna was to be mounted on the top of the lower section of the tower - but that section is about 20' tall and I wanted the antenna to be at 25' (the computer had convinced me that 30' of stacking separation was the minimum that would deliver good gain, but I wanted the lower antenna as high as possible). Since the tower is a crank-up, I couldn't just bolt the antenna onto the side of the second section at 25' without working on the raised tower, which I don't like to do (working on a raised crank-up is extremely dangerous, and in my opinion should never be attempted).
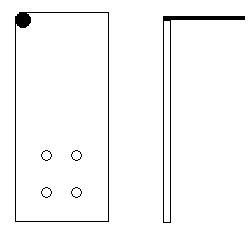
So what I did was to weld a flat 1/4" steel plate onto the top of a 3/4" steel rod 8' long. The plate was drilled to bolt directly to the boom-to-mast plate of the Hy-Gain boom that I used for the lower antenna (we built the antenna so that the boom to mast plate faced down, rather than to the side as it normally would). The rod was welded on perpendicular to the plate, just at one corner. So (not to scale), the plate and rod (without the antenna) looked like this:
Plate top view Plate and rod, side view, plate on top
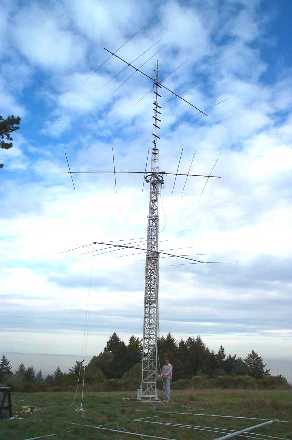
Then the rod was dropped into the leg of the bottom section of the tower, and it slid all the was down until the plate was sitting on the top of the leg at 20' (to do that, we had to partially raise the tower to get the Ring Rotor out of the way, then climb a ladder resting on the side of the tower to drop in the rod). So at this point, with the tower down, the entire 8' rod was inside the tower leg. Then the lower antenna was bolted onto the plate. A 30' long wire rope was attached to the antenna at its balance point, and to the top of the third section of the tower, where the Ring and the middle antenna were mounted. Then, after everything else was installed, the tower was raised. As the tower went up, the wire rope pulled the antenna, mounted on the plate, into the air. The rod telescoped out of the tower leg. The end result was that the wire rope kept the bottom antenna 30' below the middle one, and the rod, still sticking out of the top of the tower leg, kept the antenna in place. A rope tied to the end of the boom (actually two ropes) was used to aim the bottom antenna at 80 degrees. It was, if I may say so, a very elegant solution. And it worked perfectly. I'm not sure that I would use it for a permanent installation, but for this temporary one, it was great.
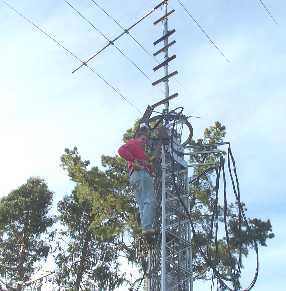
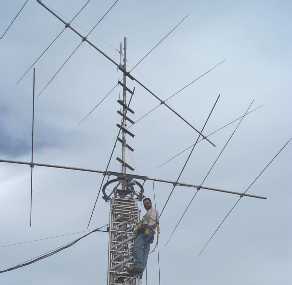
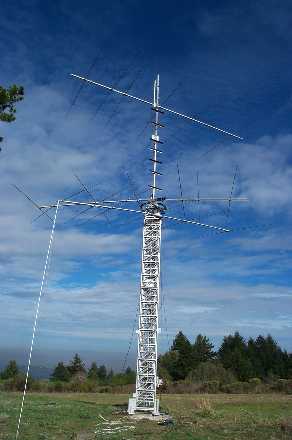
So all that said, here is a photo-montage of the last week's work on
the antennas. Click on the picture to get a bigger image, and a description
of what is going on:
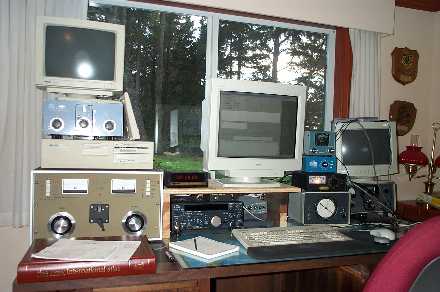
By the end of the day Thursday, the tower was up and the station was put together. My goal had been to reach this point a week before the contest, instead of the day before, but it still felt great. We got on Thursday evening and worked a few stations, and everything worked pretty much first time. No RF feedback, no problems with the computer interface (I brought my TS-850, my computer, and my interface hardware from my home station). On the whole, the entire pre-contest project went off without any major problems. It was a ton of work, but I was very pleased with the result.
Before I move on the the actual event, a word about my game plan. My goal was to make the top ten in single op, high power, side-band only. Last year, the 10th place score in that category was K4JNY with 723,384. So I set my goal at 750,000 points. I guessed that 3000 QSO's might be a reasonable number, so that meant I needed 125 multipliers. In my postmortem, I will discuss how I did actual-vs-plan - but 3000 x 125 was my target.
Enough about the pre-contest stuff. The final two parts of this story will cover the contest itself, and the postmortem.